 | ||||||
akai mpc 2000
mpc sound
akai mpc 2000xl
,drum kits for mpc2000,drums for mpc2000,drums for mpc2000xl,drums for mpc3000,mpc3000 sounds,mpc3000 drums,drum sounds mpc3000,drum samples mpc3000,drum samples,how to make beats,hip hop beats for sale,beats for sale
akai mpc 1000
hip hop drum kit
mpc2500
mpc 2500
making beat
beat making studio
fruity loop beat making
hip hop kits, fruity loops sounds,wavs for fruity loops,underground hip hop production, underground hip hop producers
| ||||||
Chopping a sample in KONTAKT 101 Tutorial
| ||||||
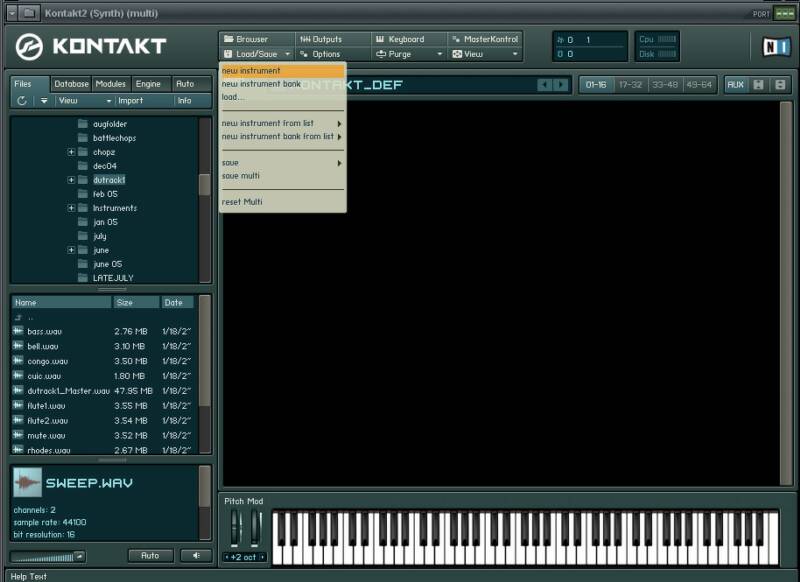
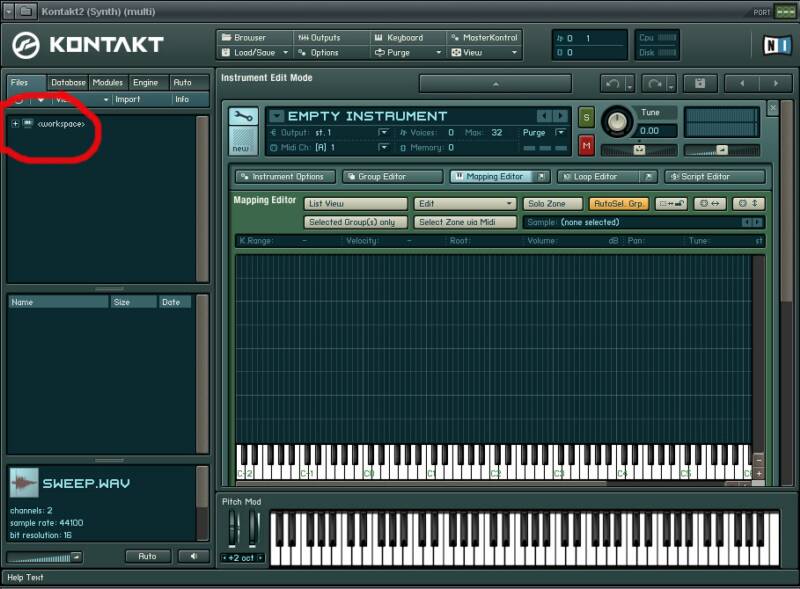
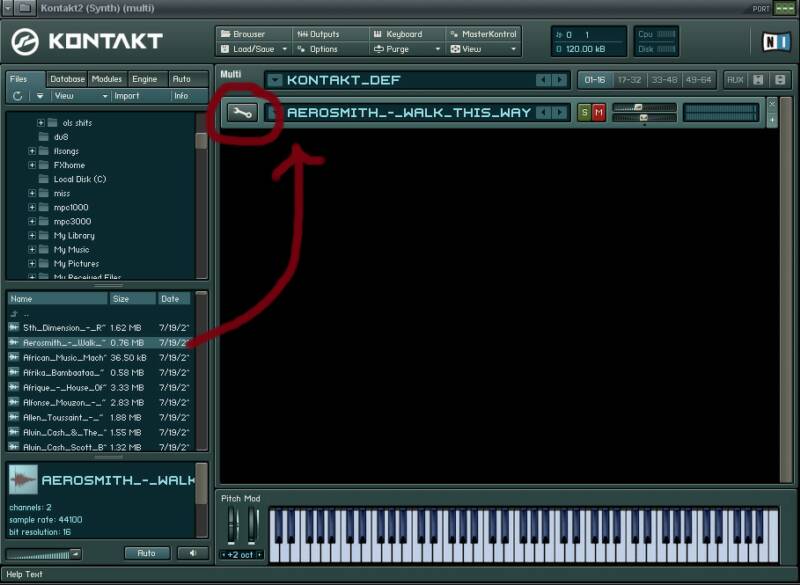
Lets get started!! The 1st thing you have to do is click on "Load Save" and select "New Instrument"
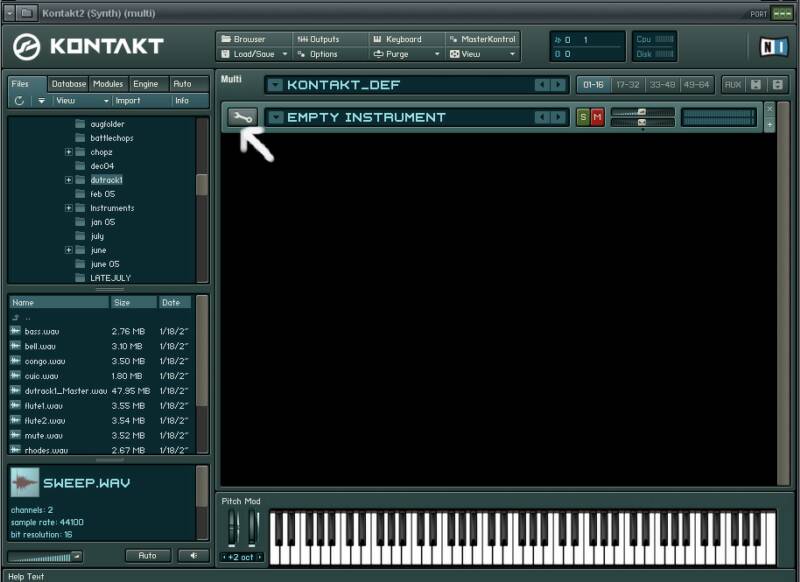
Then click on the tool wrench icon.
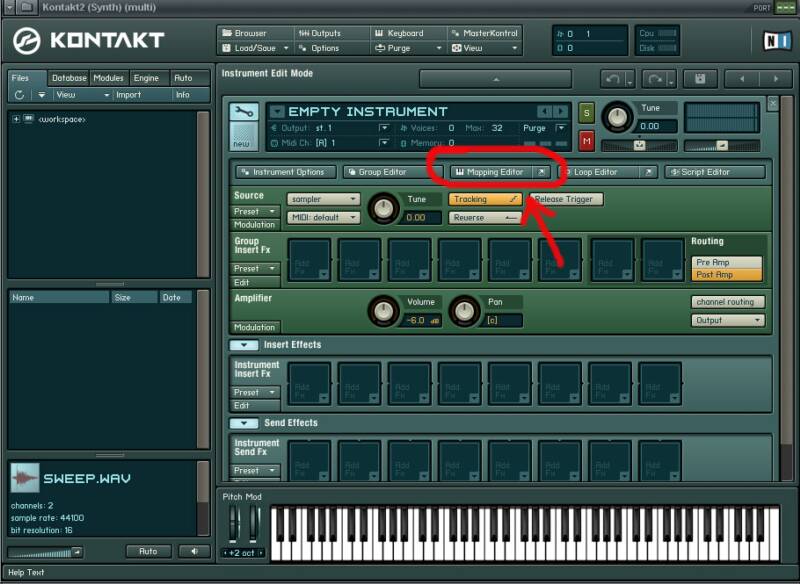
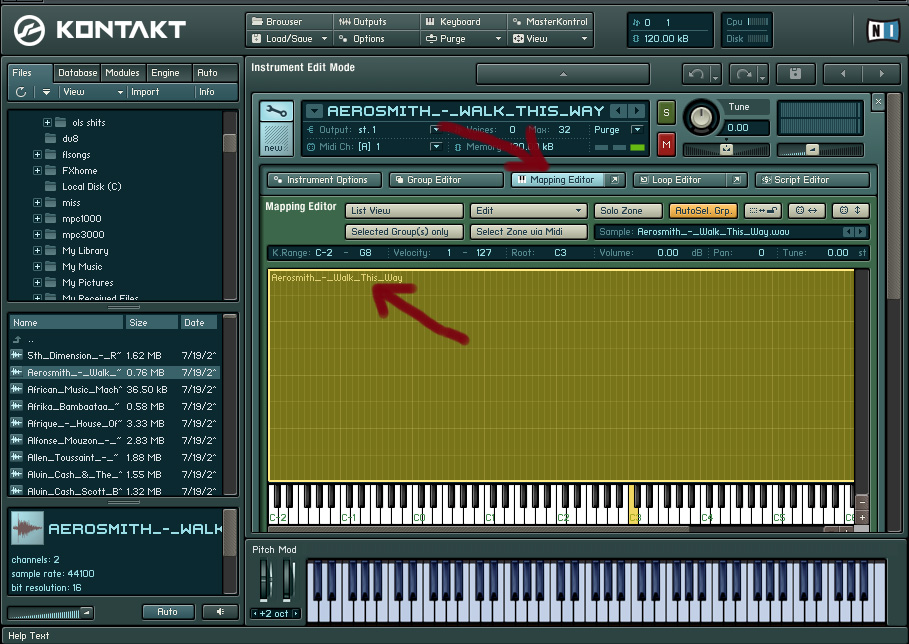
Now find the "Mapping editor" button and click it.
Once in the Mapping editor click on the "Workspce" folder in the top left to pull us a sound saved on your hard drive.
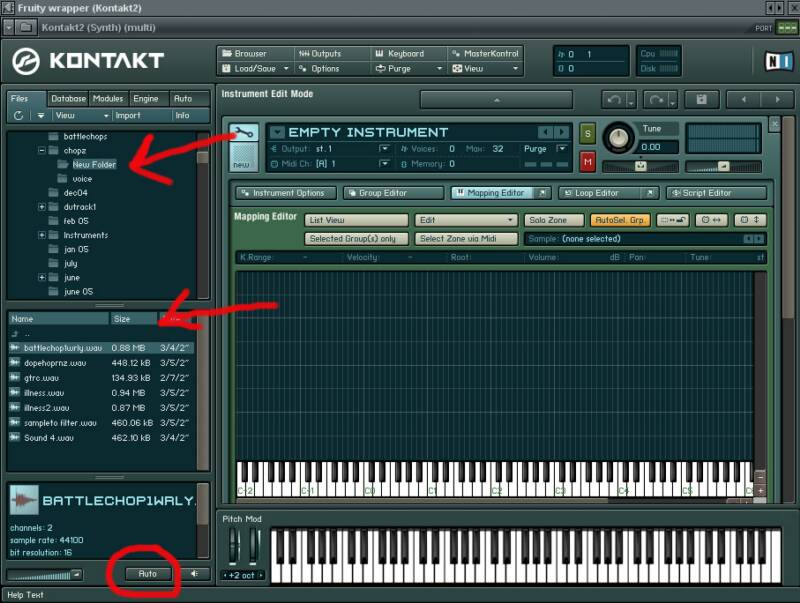
Find the folder the sound you want to use is in,when you click on the folder you will see all the sounds in the folder in the box below.If you push the "Auto " button it will pay the sounds when you mouse over them.
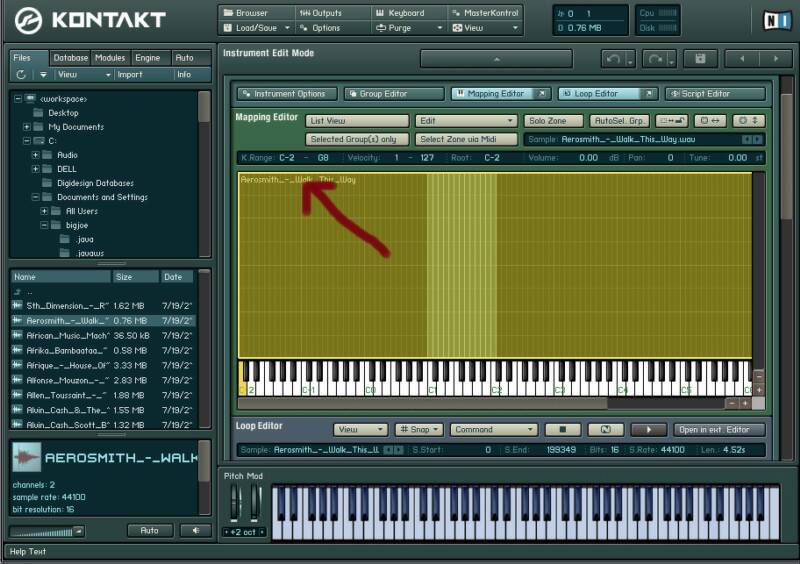
Once you find the sound you want to use drag and drop it over to the keyboard key you want in on.
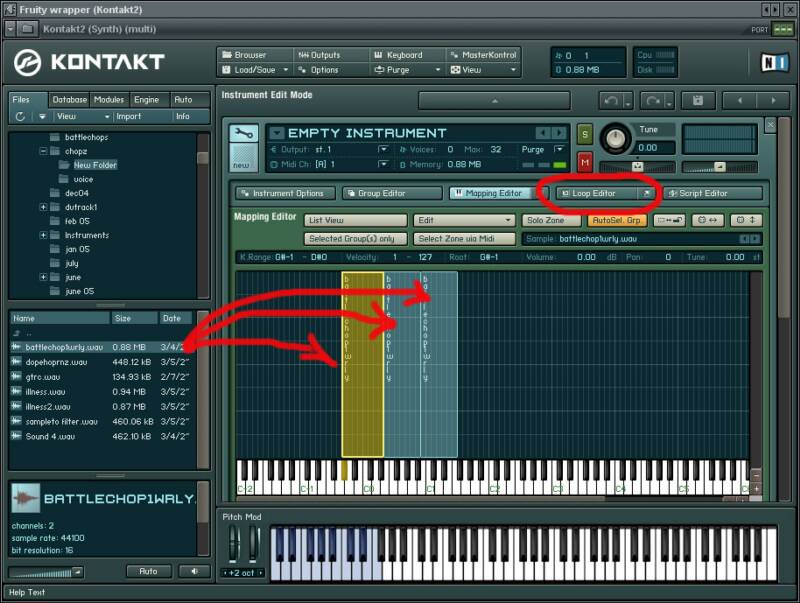
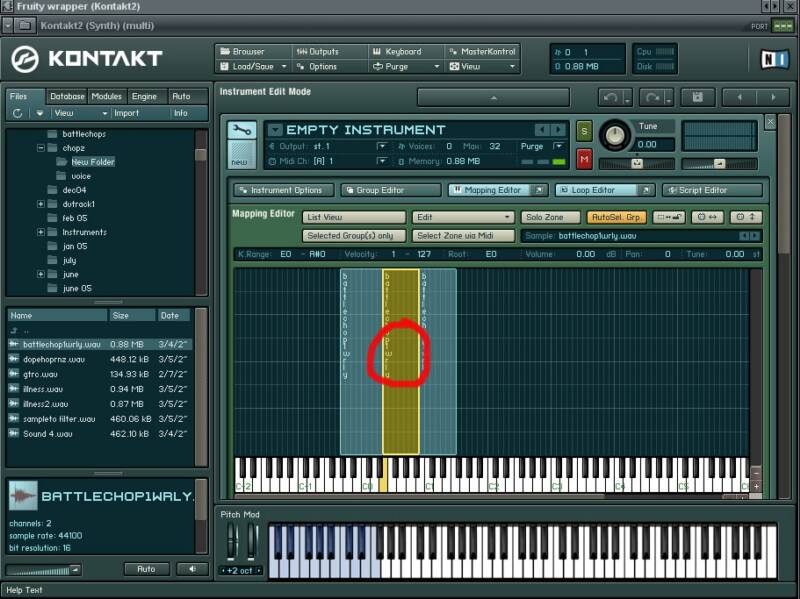
Drag the same sample you want to chop to a few different keys ranges.
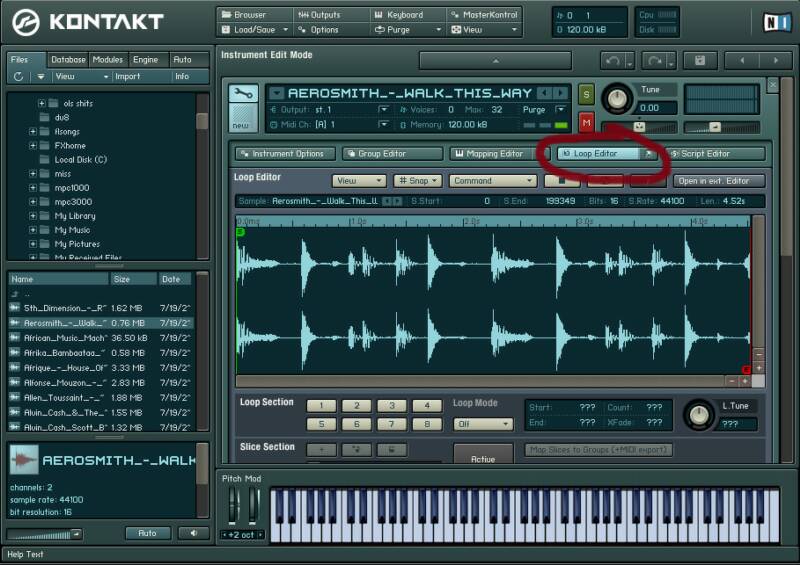
The once you have dragged the same sound to a few different keys you can double click on the sample in yellow or click on "Loop editor"
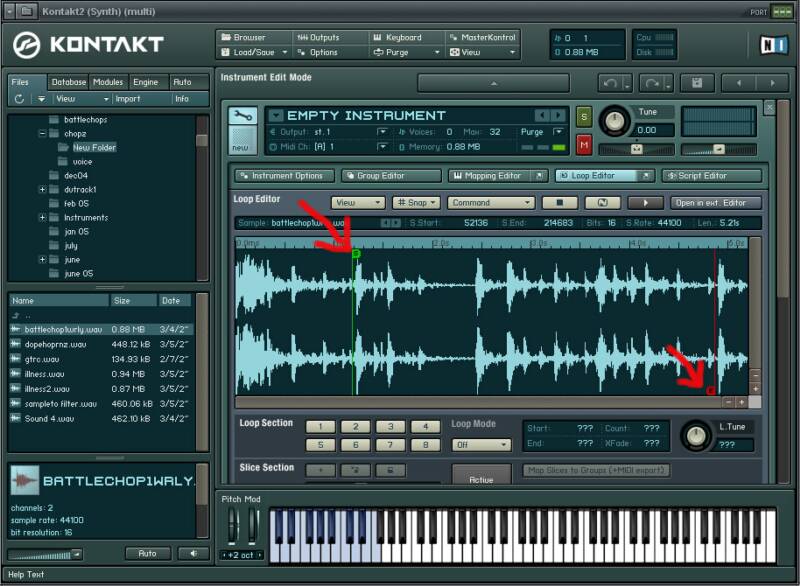
Here in the Loop editor you adjust the start and end points of the sample buy dragging the "S" and "E" bars. When you are done editing the sample how you want it for the 1st chop click back on "Mapping editor" so we can edit the start and end points of the next sample.
Find the 2nd copy of the sample you dragged to the keys and double click on it or how "Loop editor"
Now edit the start and end points of the 2nd copy of the sample,and repeat the last 2 steps on the other copy's of the samples.
There you go,chopping a sample in Kontakt 101.
Ok here I will show you 2 different ways to chop samples in Kontakt.Both ways are good but the 1st way does not involve saving and exporting the file before you can use it.
The 1st way we take one long sample and chop it into a few different parts in Kontakt 2 without using the "Beat Machine" mode.
How this works is you take the same sample,then make up you mind how many chops you want to make out of it,and finally you drag the sample sample to many different keys and adjust the start and end points for each one.
-------------------------------------
The 2nd part of this page will show you another method of chopping samples in Kontakt by using the "Beat Machine" mode
-------------------------------------------------------------------------------------------------------------------------------------------------------------------------------------------------------------------------------------------------------------------------------------------------
| ||||||
Part 2 Chopping a sample using the "Beat machine" mode.
Find your sample you want to use and drag and drop it into Kontakt.
Then click on the Tool Wrench icon.
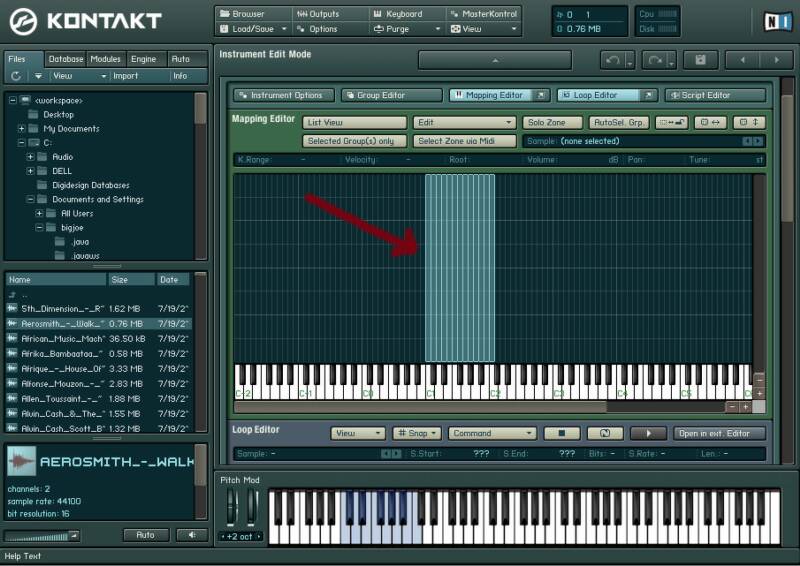
Click on "Mapping Editor" and then find the samples name in the top left and double click on it ( now your sample is selected )
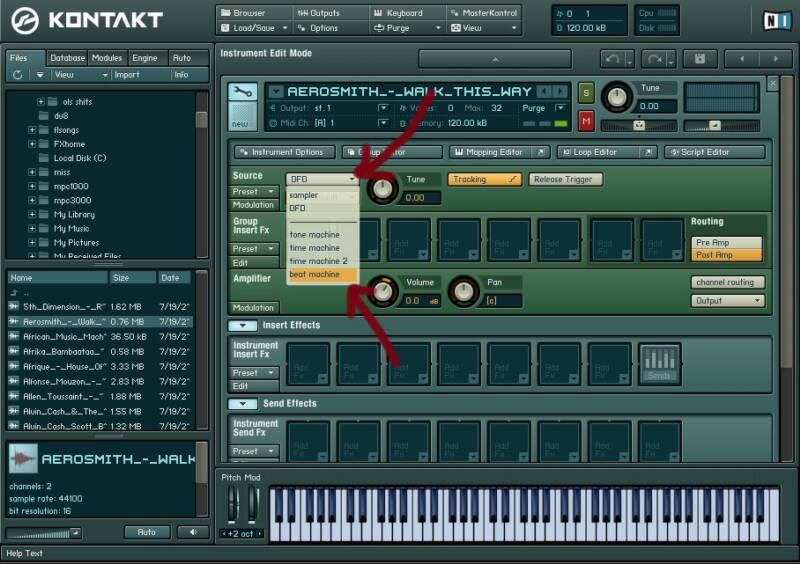
Now Find the "DFD" drop down menu and select "Beat Machine"
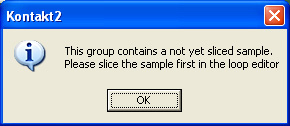
Click ok to this message.
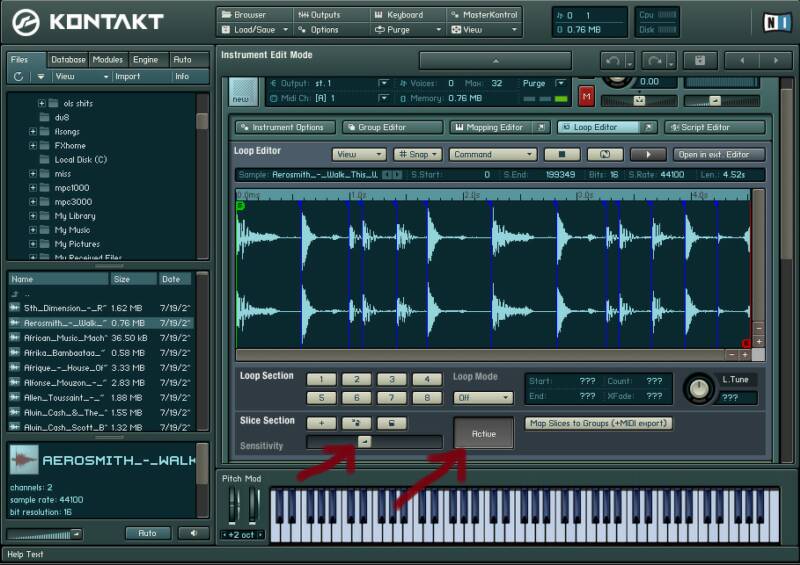
Find the "Activate" button and press it.
You will now see blue bars in your sample,these are the slice points.
Find the "Sensitivity" fader and slide it left until each music event(your slices markers) have a blue line in front of it.
You can audition sounds by left clicking/hi lighting the clicking.
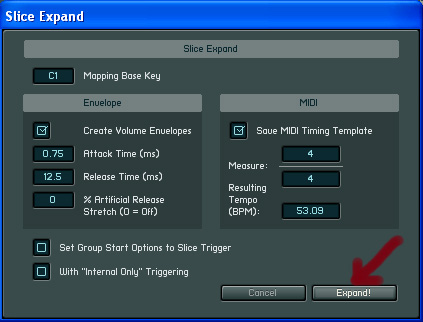
Click on "Expand" and save it to a folder in your hard drive.
Your almost done,now just click on "Mapping Editor" and click on the samples name again in the top right.
This will turn it yellow,when yellow hit delete.
Well there you go,your sample has been chopped and assigned to keys,you can see it here in the mapping editor.
Hit your keyboard controllers keys starting from "c1" and your will hear all you slices are mapped to your keys,you are done.
You will now be in the "Loop Editor" by default.
So go ahead and click on "Loop Editor" to bring you out of this screen.
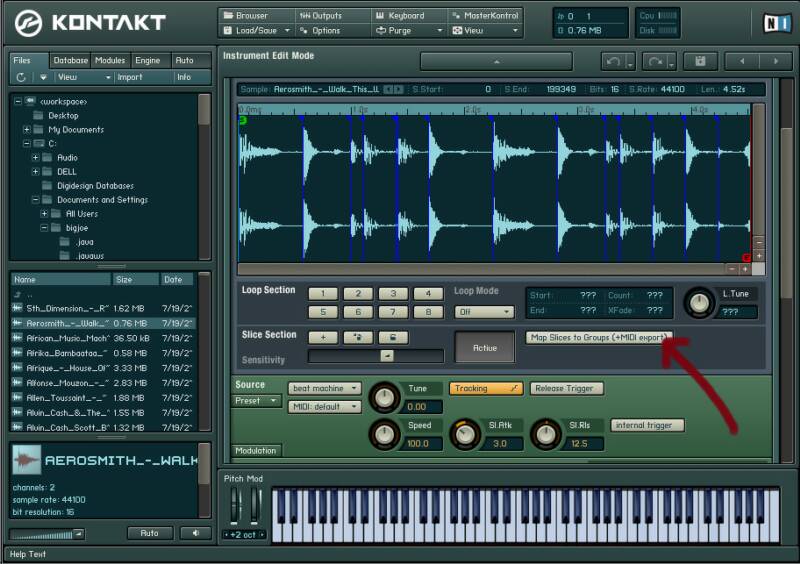
Once you have all you slice points how you want push
"Map Slices To Groups (+ Midi Support)